Uploading new images
Finding images
You can use any image satisfying the following requirements:
Images must be in bitmap (BMP) format, with 24 bit color depth. Use any software you like to convert images in other formats to bmp - e.g. you can use Microsoft Paint 3D.
The images are shown one horizontal line at a time; thus, it is recommended to use images with width of 72 pixels - to match the number of LEDs on the staff. Maximal image size is 72x288 pixels.
Image filenames must be at most 30 symbols long and can only contain letters, numbers, dashes and underscores. No spaces or special symbols!
You can create your own images or search for existing ones. A good source for POV image patterns is Visual POI Zone. When downloading images from there, make sure to choose Visual poi V4 mini (72px) option. You will also need to rotate images 90 degrees.
Please note that the same color (i.e. the same RGB values) can look quite different on the screen of your computer and on LED strip. Experiment with colors to get some feel for it.
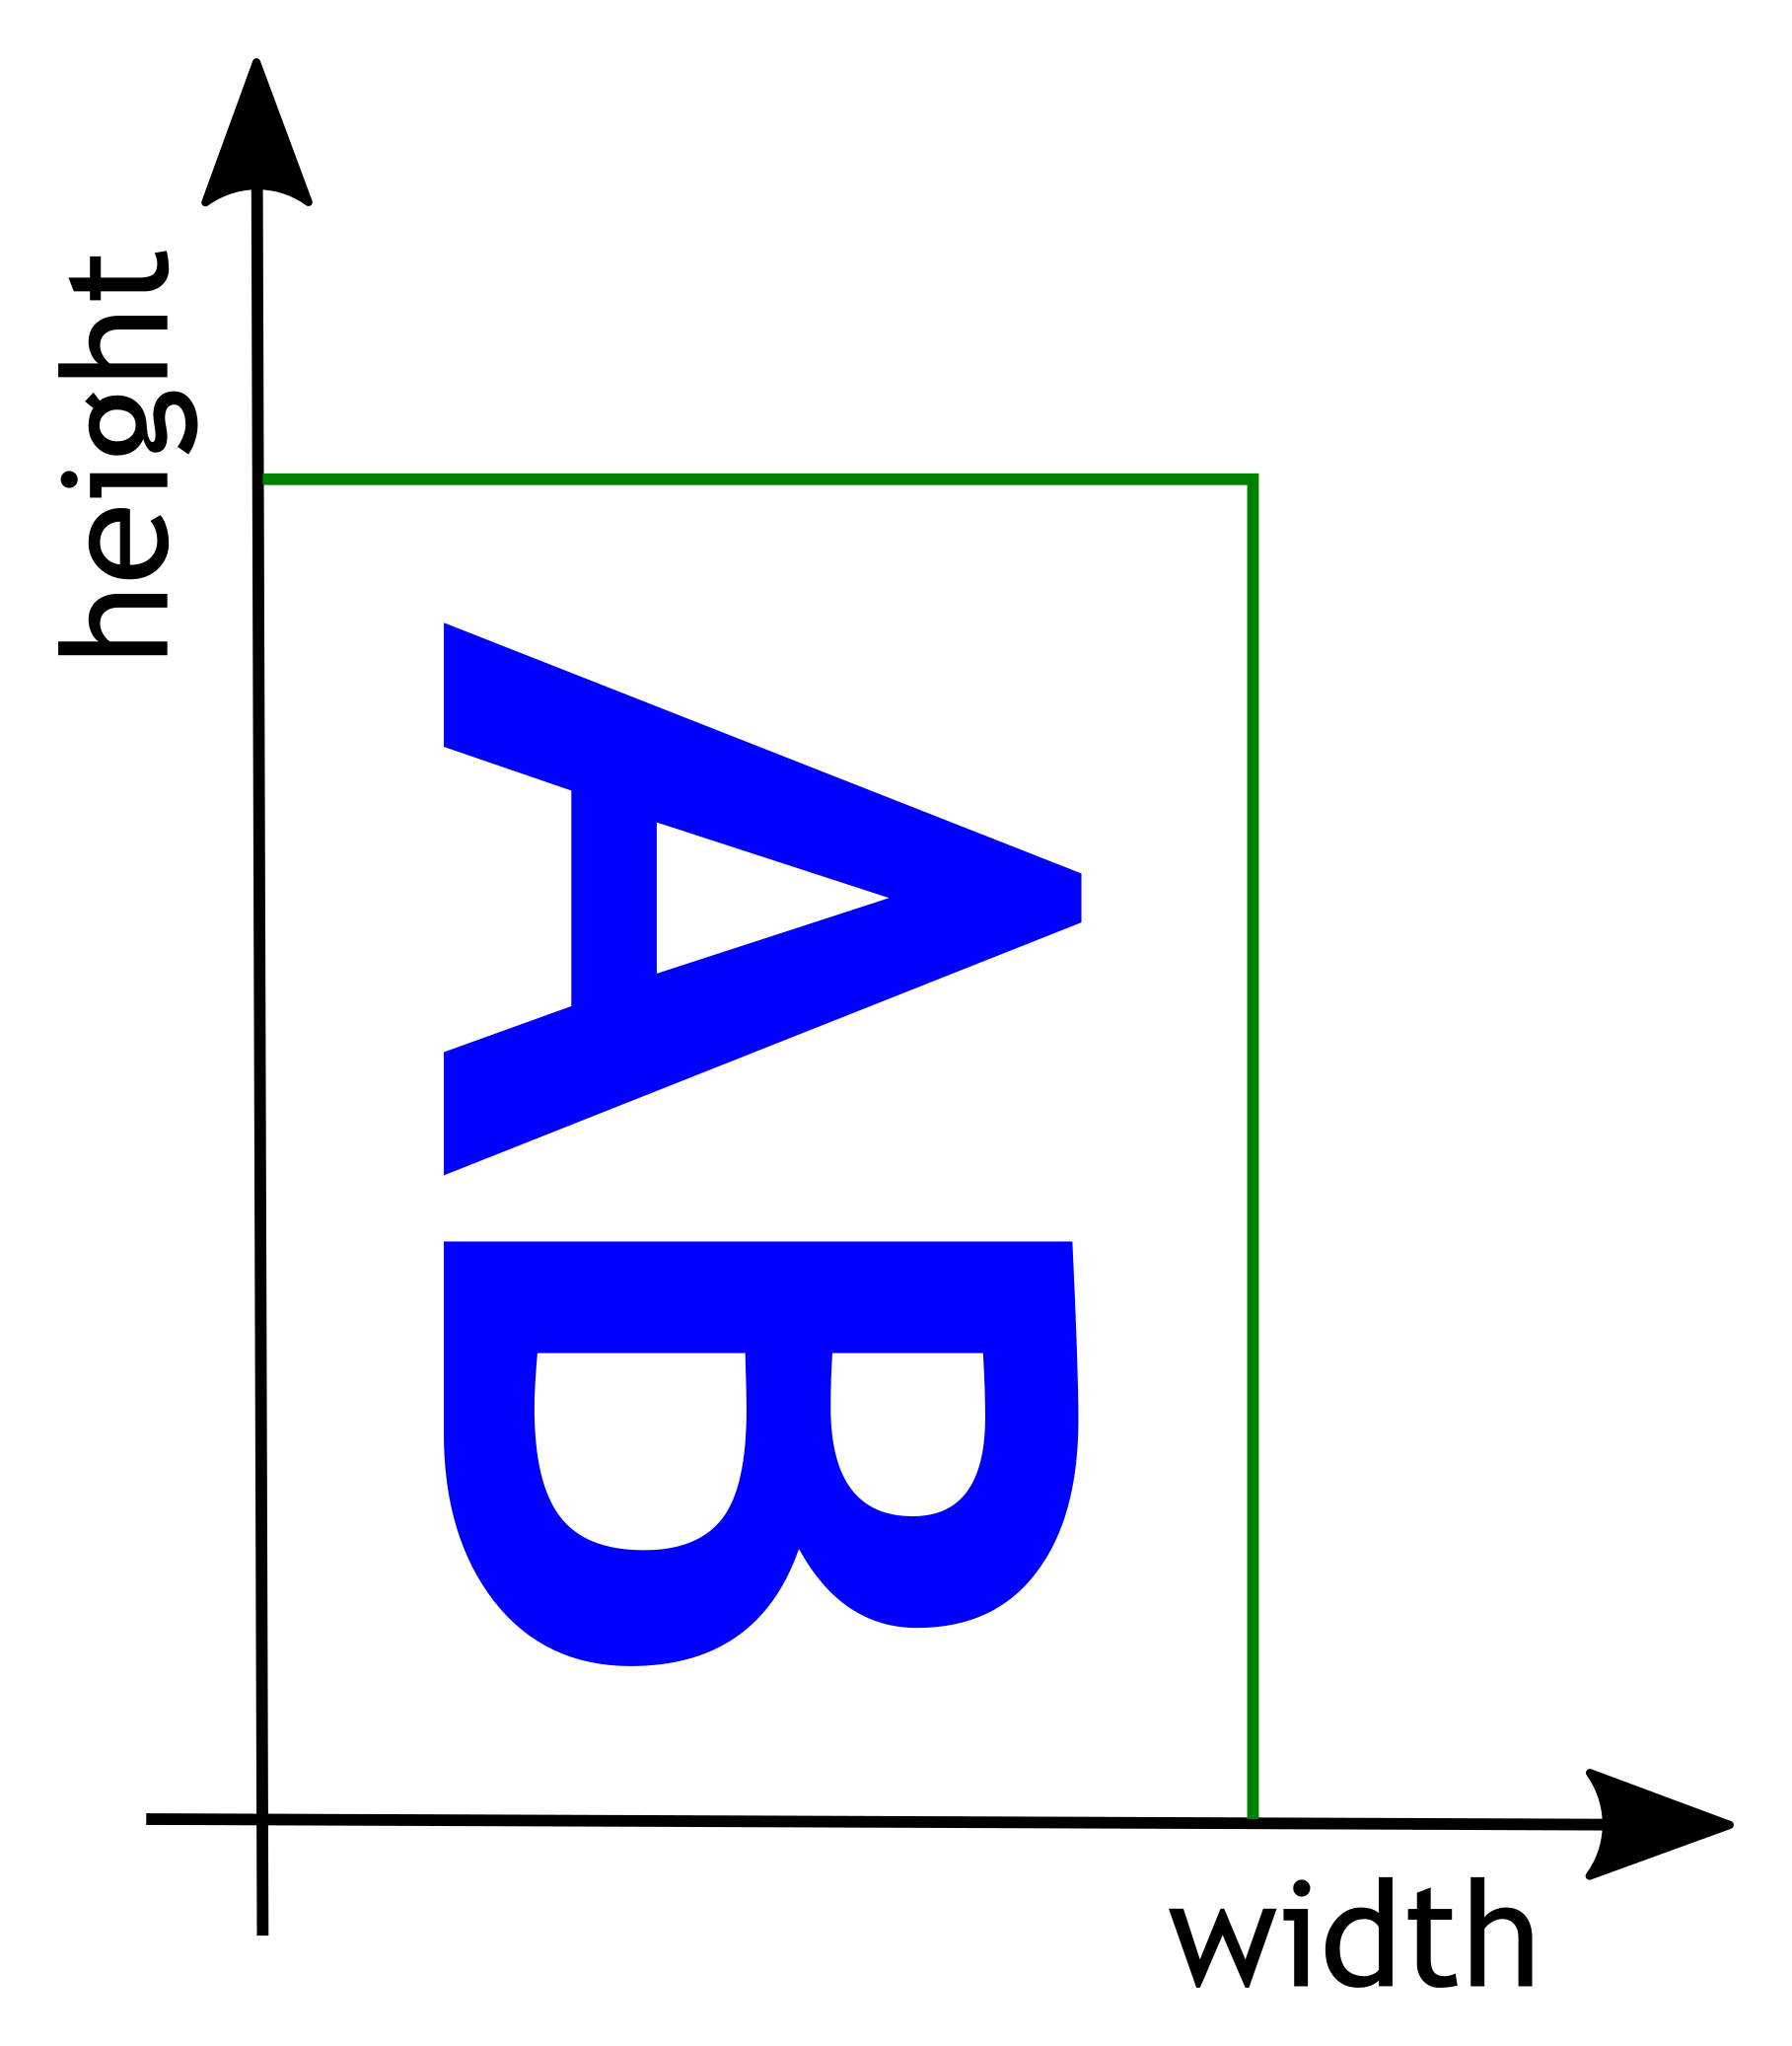
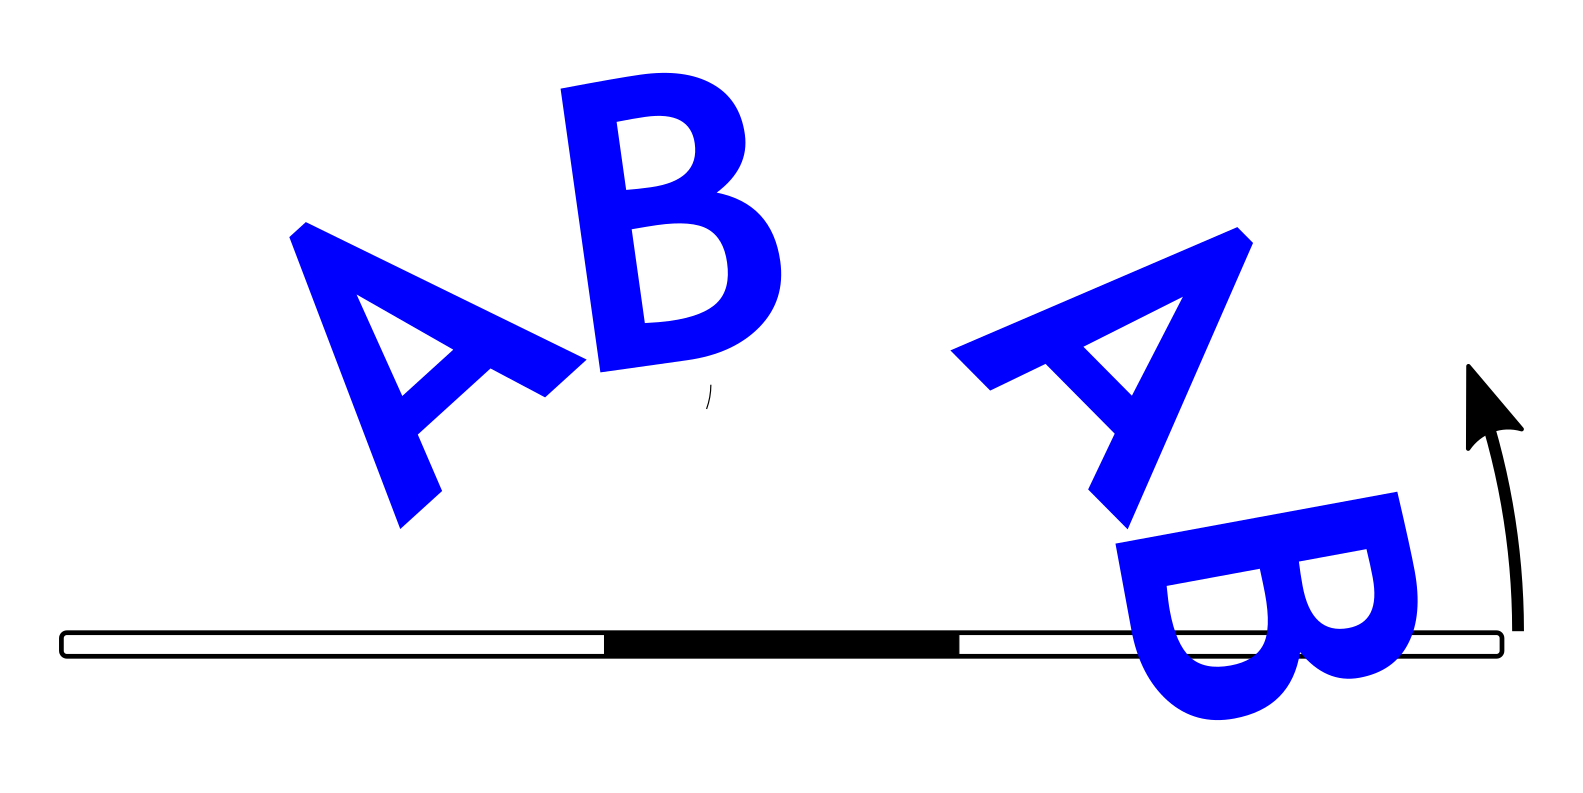
To help you figure out correct rotation and orientation of images, the pictures below show the same image in BMP file and how it will look when using the POV staff.
Directory images in the GitHub repository https://github.com/shurik179/povstaff contains some sample images and imagelist.txt file. These images have already been uploaded to the staff.
Creating imagelist file
Once you have found or created your own images, move them all to the same folder on your computer.
Now, you need to create a list showing in which order these images should be played during the show. Create the file imagelist.txt in the same folder as the images (or open the file if it already exists) and put there the list of image files in the order you want to use them in your show, one filename per line. Include the .bmp extension in each filename, and put leading slash (/) before each filename, as shown below. Optionally, you can also add how long the image should be shown, in seconds (whole numbers only!), separated from filename by one or more spaces:
/image1.bmp 20
/image2.bmp 41
/image5.bmp 10
/image1.bmp
You can include some image file more than once, or not at all - it is your choice. The name of your image list must be imagelist.txt, all lower case.
Uploading images
To upload images, place the staff on a horizontal surface (e.g. on the floor) and turn it on. It will briefly light up to show the battery voltage and then go into upload mode; to indicate that, every 4th LED should be lighted in light green color.
Wait for 20-30 seconds and open the WiFi search dialog of your computer. You should see there a new WiFi network with the name POVSTAFFXXXX, where XXXX will be replaced by a 4-digit number, unique for each staff. Connect to this network, using the password which you can find in the information sheet included with your kit; if you misplaced it, email irobotics.store@gmail.com for help.
Type the following address in the URL field of the browser: http://povstaff.local:8080 (note: the staff doesn’t support https protocol. If your browser gives you a warning about unsecure connection, click on “continue to site”.) You should see the webpage of the staff, which looks as follows:
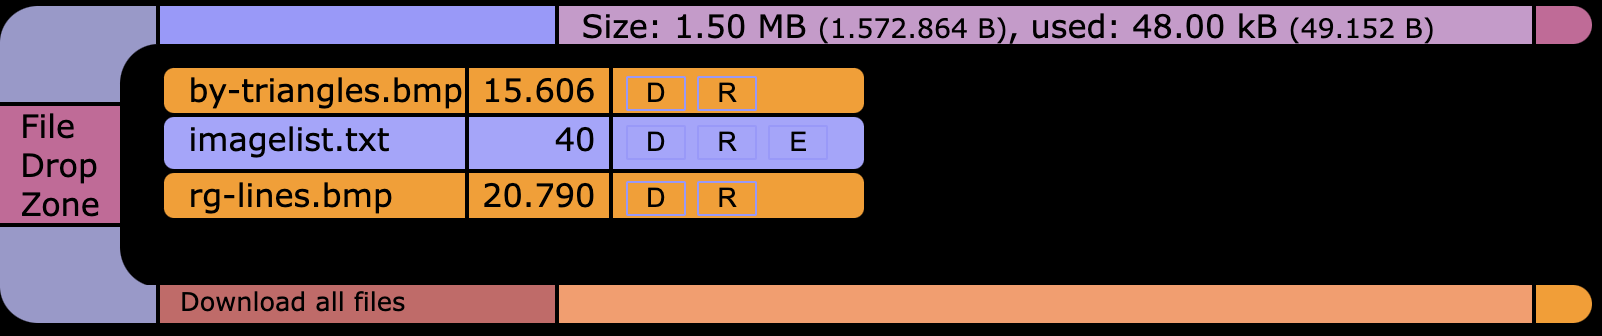
Drag and drop the image files and the imagelist.txt file to the file drop area area of the webpage.
You can delete files you no longer need by pressing on letter ‘D’ next to the filename. You can also edit imagelist.txt file online by clicking on ‘E’.
Once the files have been uploaded, just turn the staff off.