Step 4: Switch
Materials:
Switch
Switch spacer
Zipties
Before starting, make sure that your switch is in middle position; this will guarantee that the power is off.
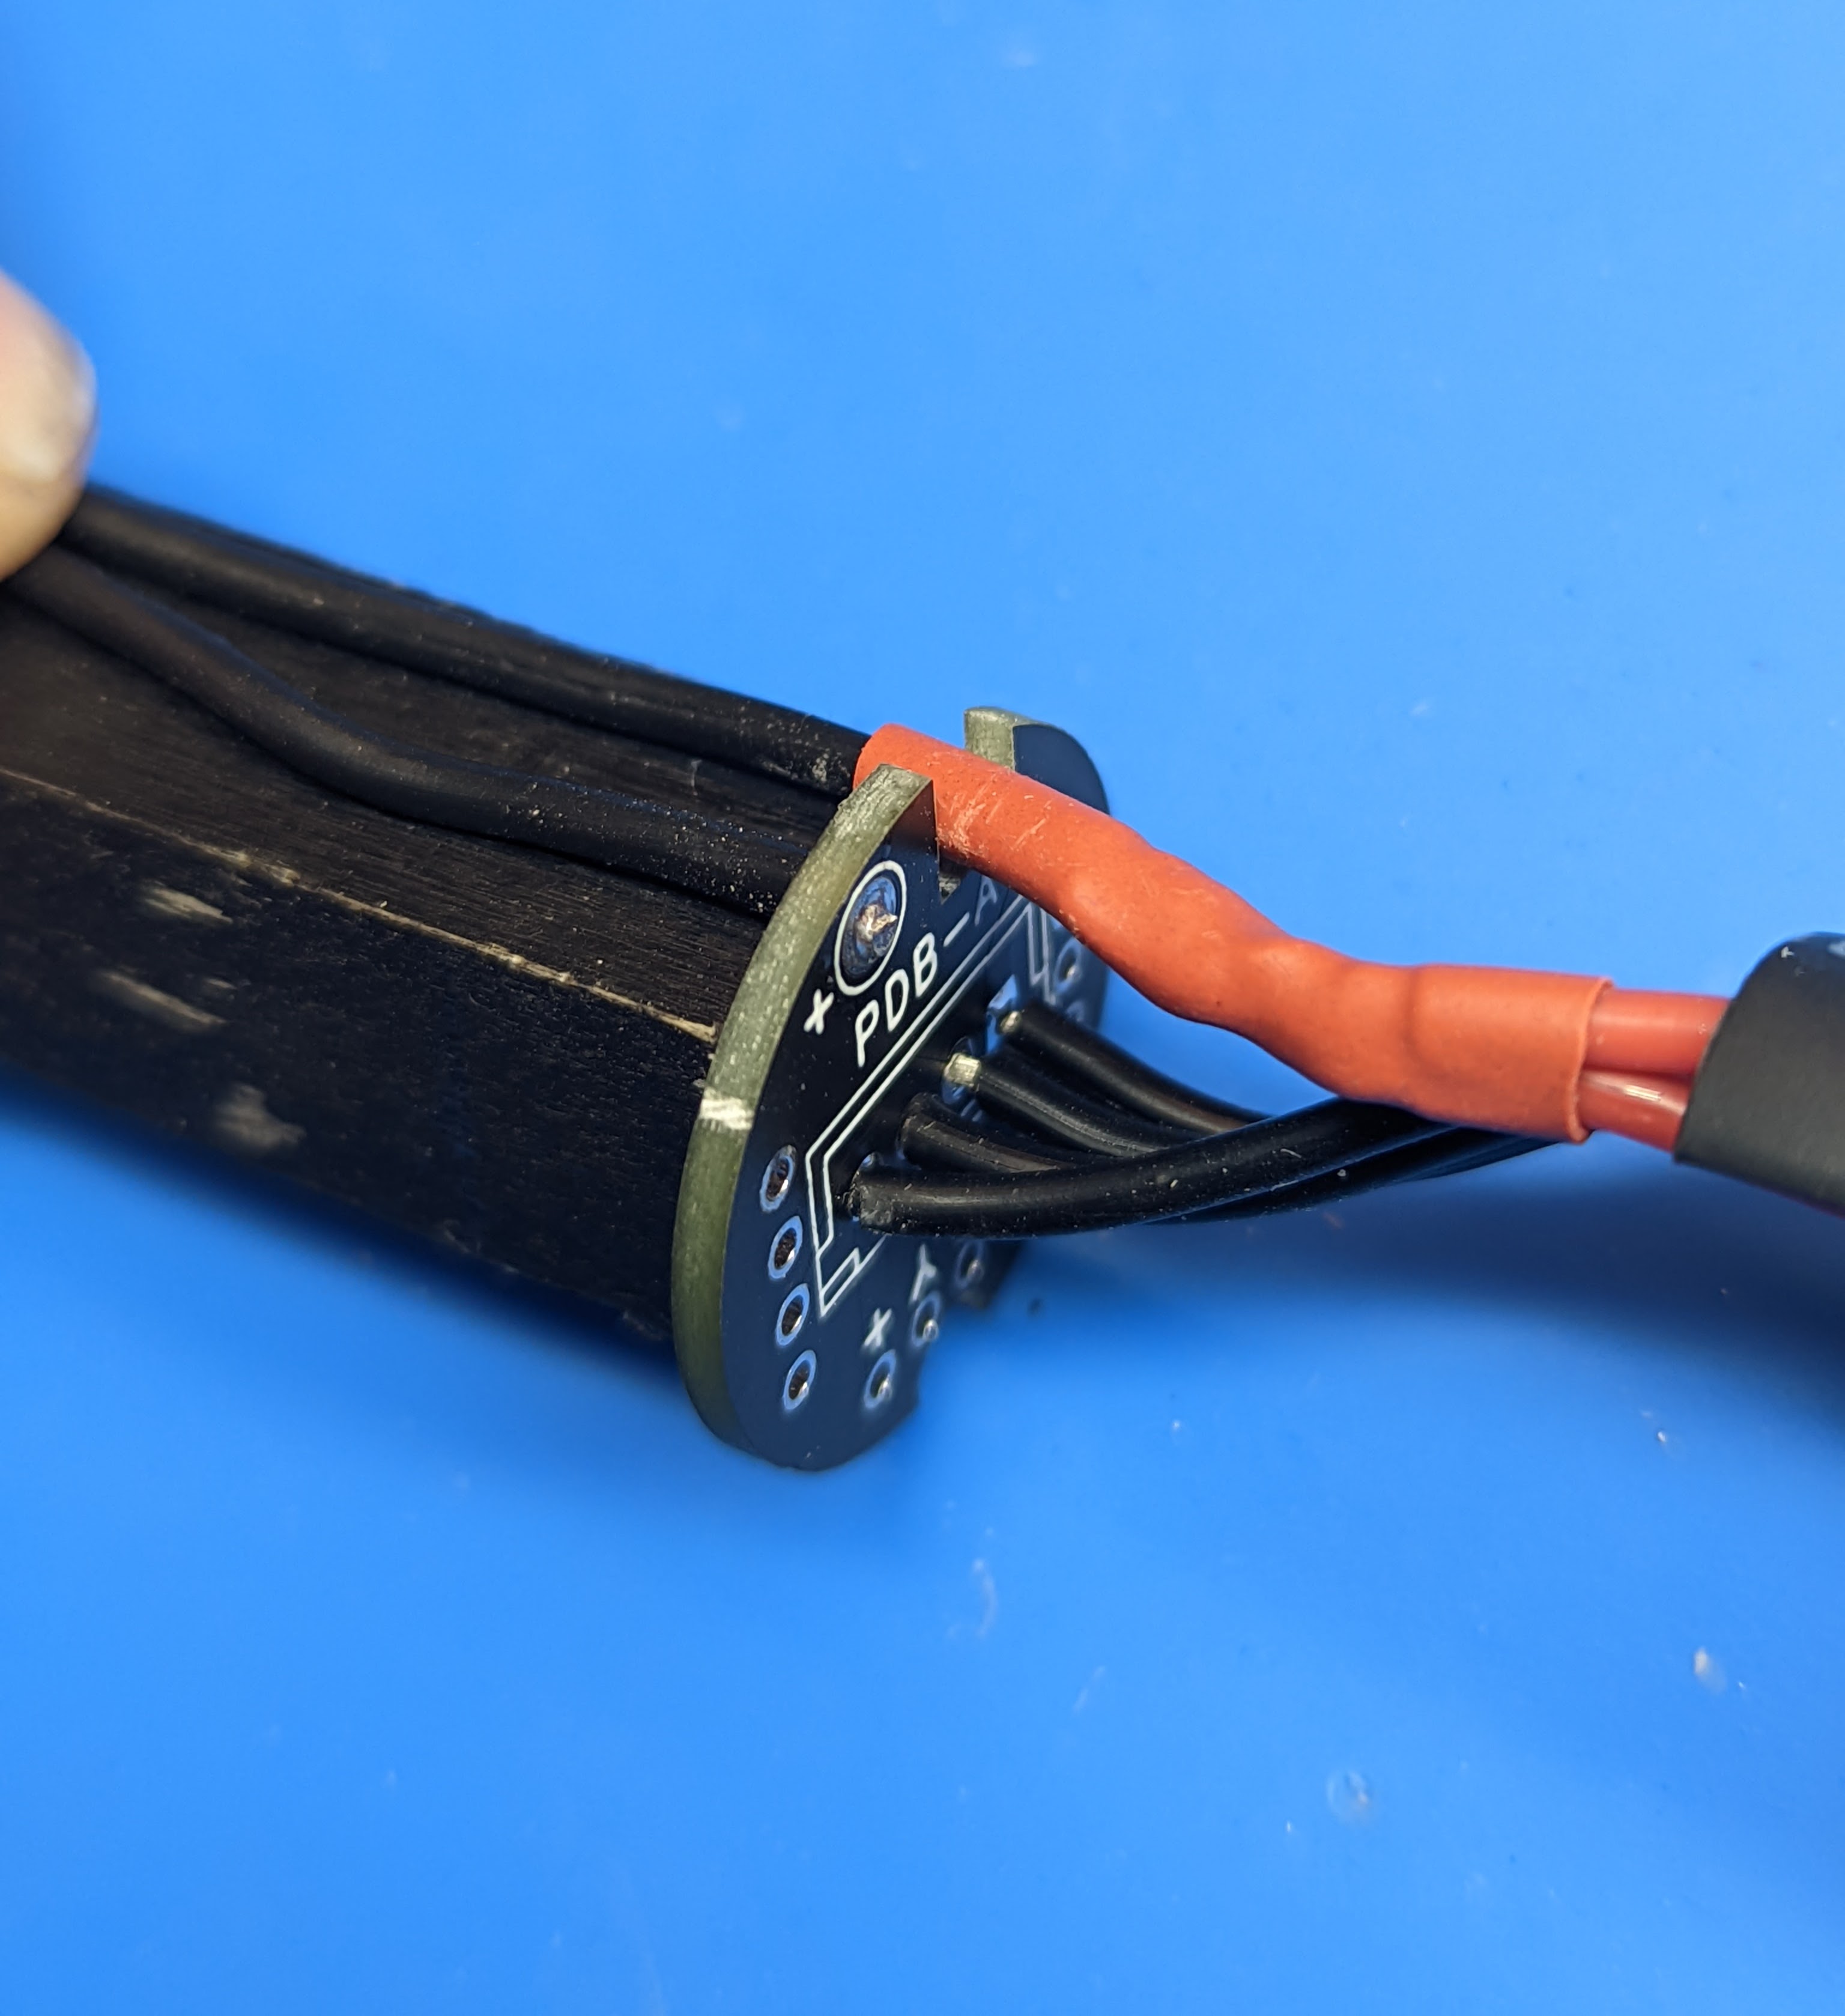
Locate the switch leads (two black wires, about 55 cm length) leading from the battery assembly. Lay them along the dowel, running the wire through the rectangular cutout in the PDB. Solder the tinned end of one of the leads to the PDB as shown in the photo below. Use the flush cutters to trim the soldered wire. Make sure that there is enough wire length to insert a spacer between the battery and PDB.
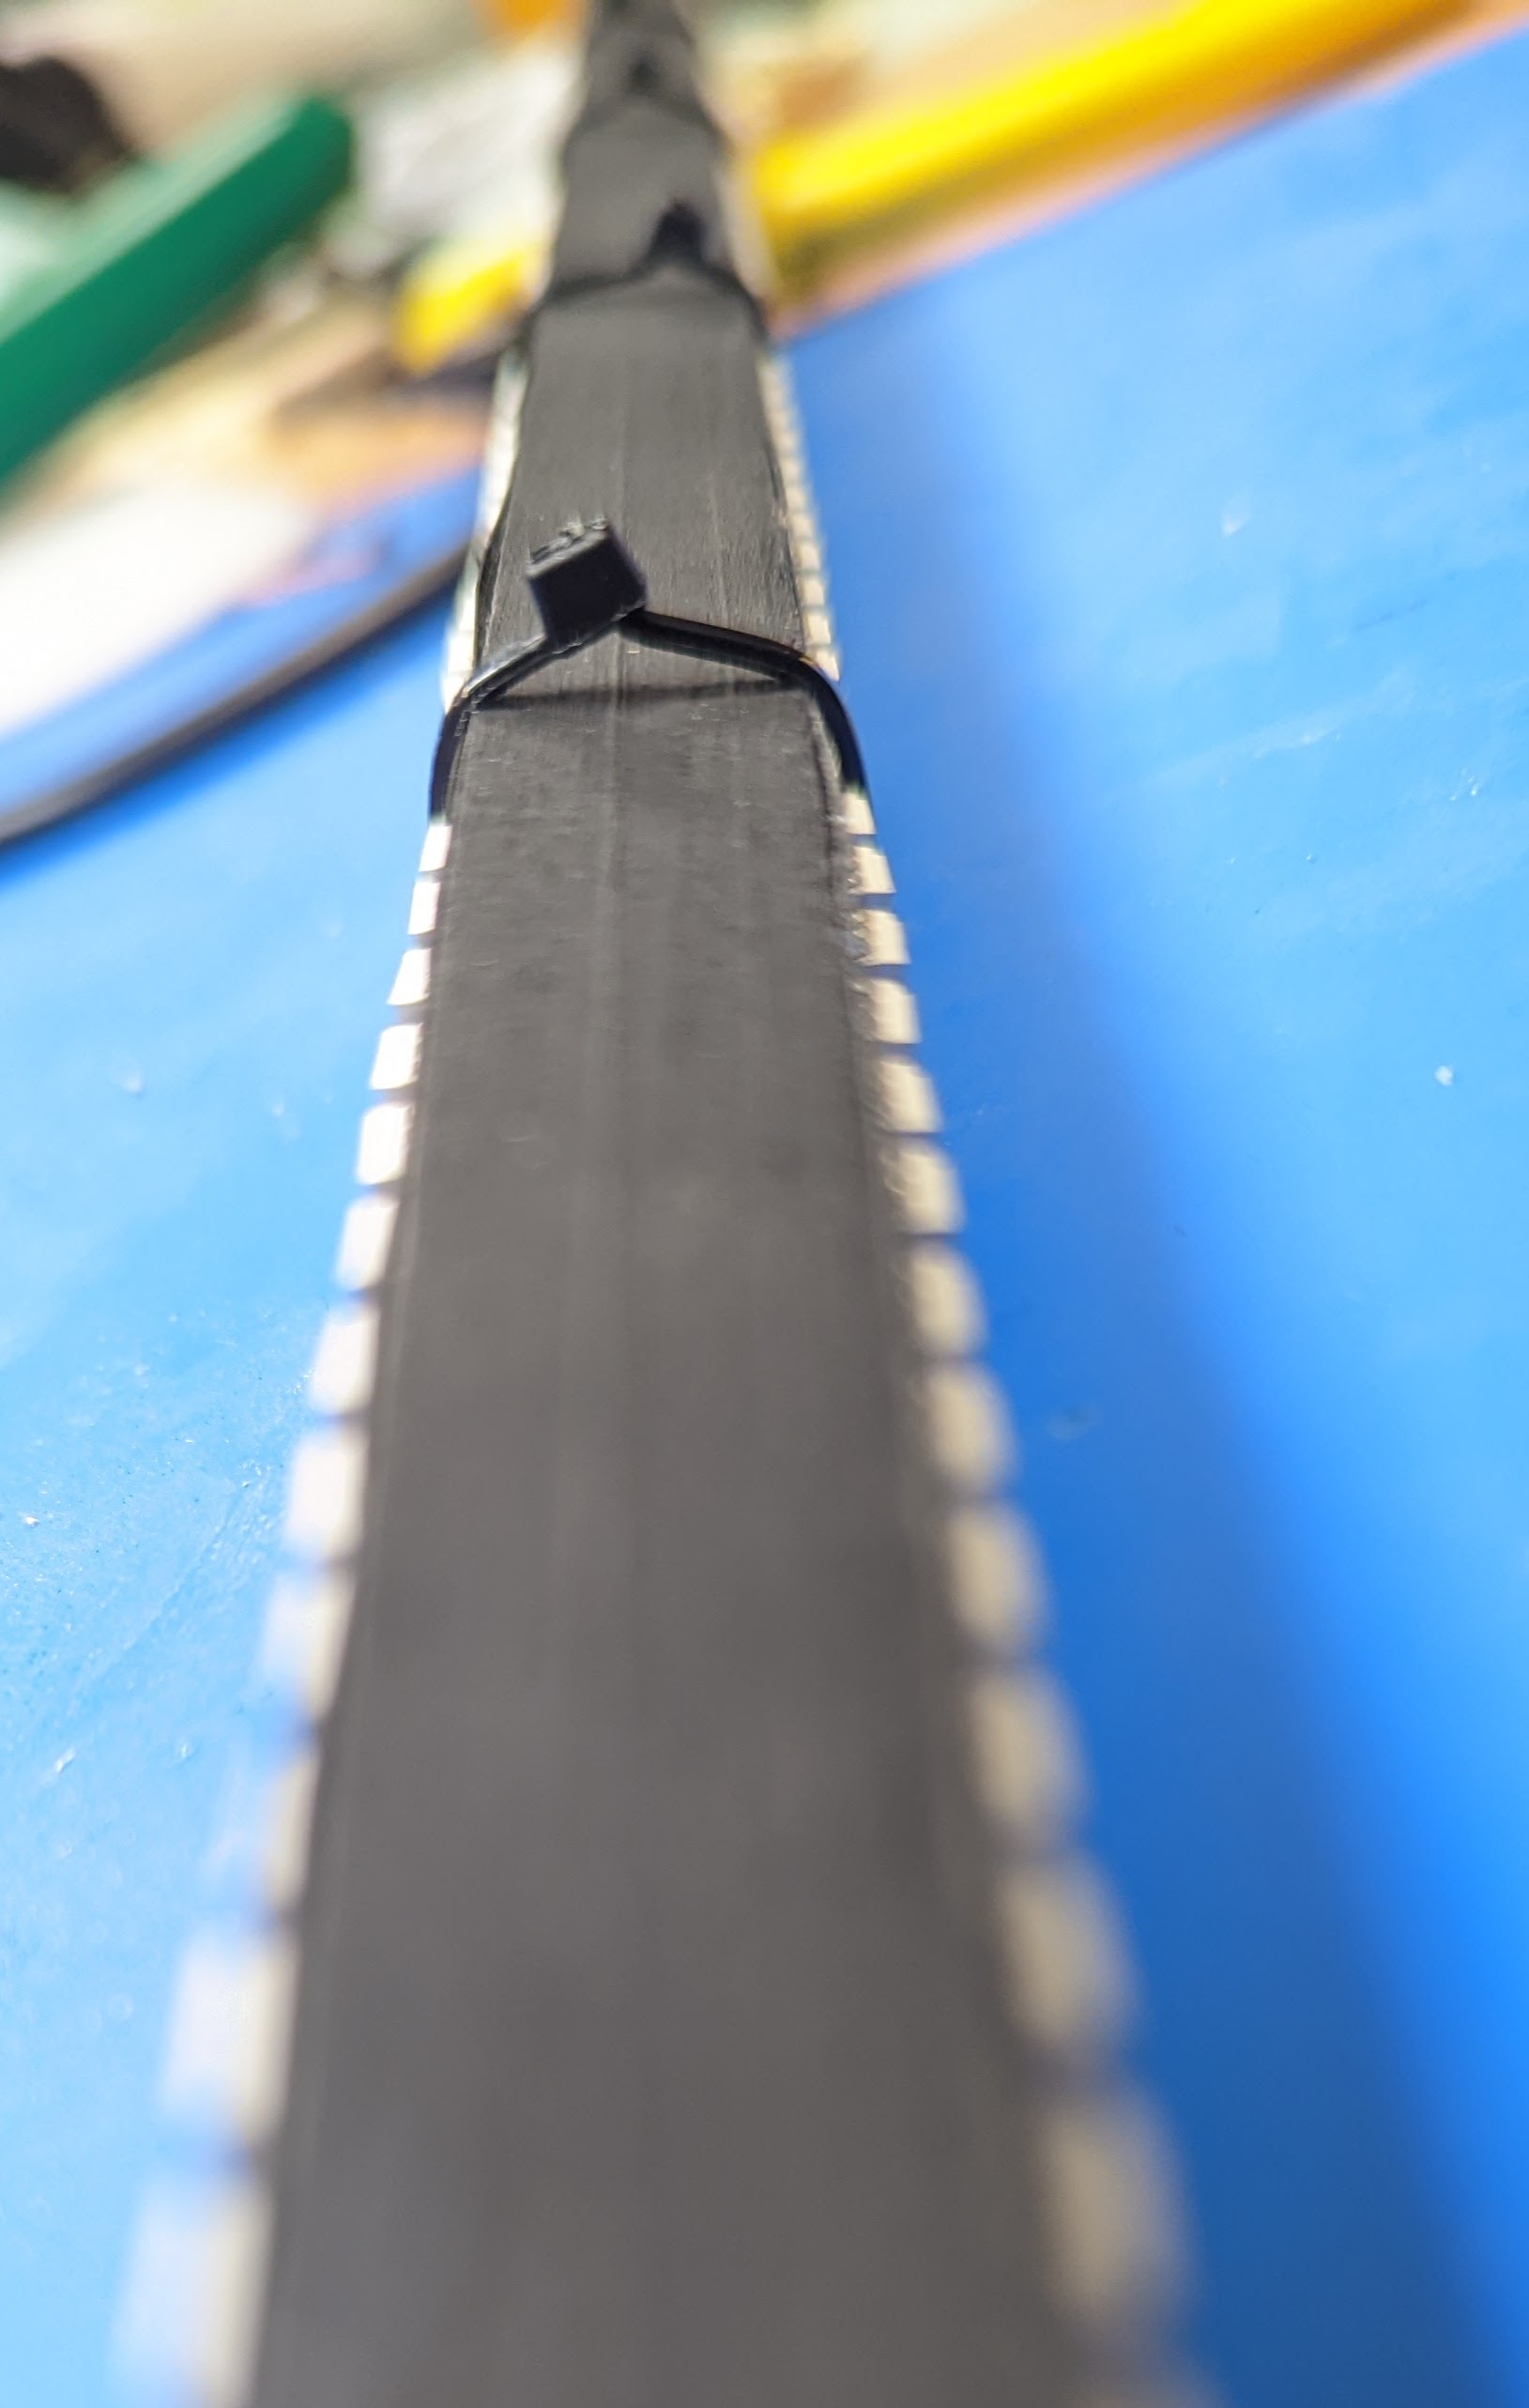
Use the flush cutters to cut open the two retention plastic tabs on the sides of the switch, as shown in the photo below.
Run the wires along the length of the dowel. Solder the tinned ends of the wires to the switch; as before, trim the soldered wires using flush cutters. Note: one of the wires must be soldered to the middle contact, and the other, to one of the other contacts (doesn’t matter which one). It doesn’t matter which of the two wires is soldered to the middle contact.

Use zipties to fasten the LED strips and the wiring to the dowel. The zipties should fit in the spaces between LEDs. The head of the zipties should be in the middle of the empty side of the dowel (without LEDs or wiring) - not at the corner! Place zipties every 7-8 cm or so. Tighten them (but not too tight, to prevent them from breaking) and trim.