Step 6: Batteries
Warning: In this step, you will be soldering leads to Li-Ion batteries. This could be dangerous if not done right! Please read all instructions carefully and wear eye protection. You are working at your own risk!
Materials and tools:
Bag D from the kit
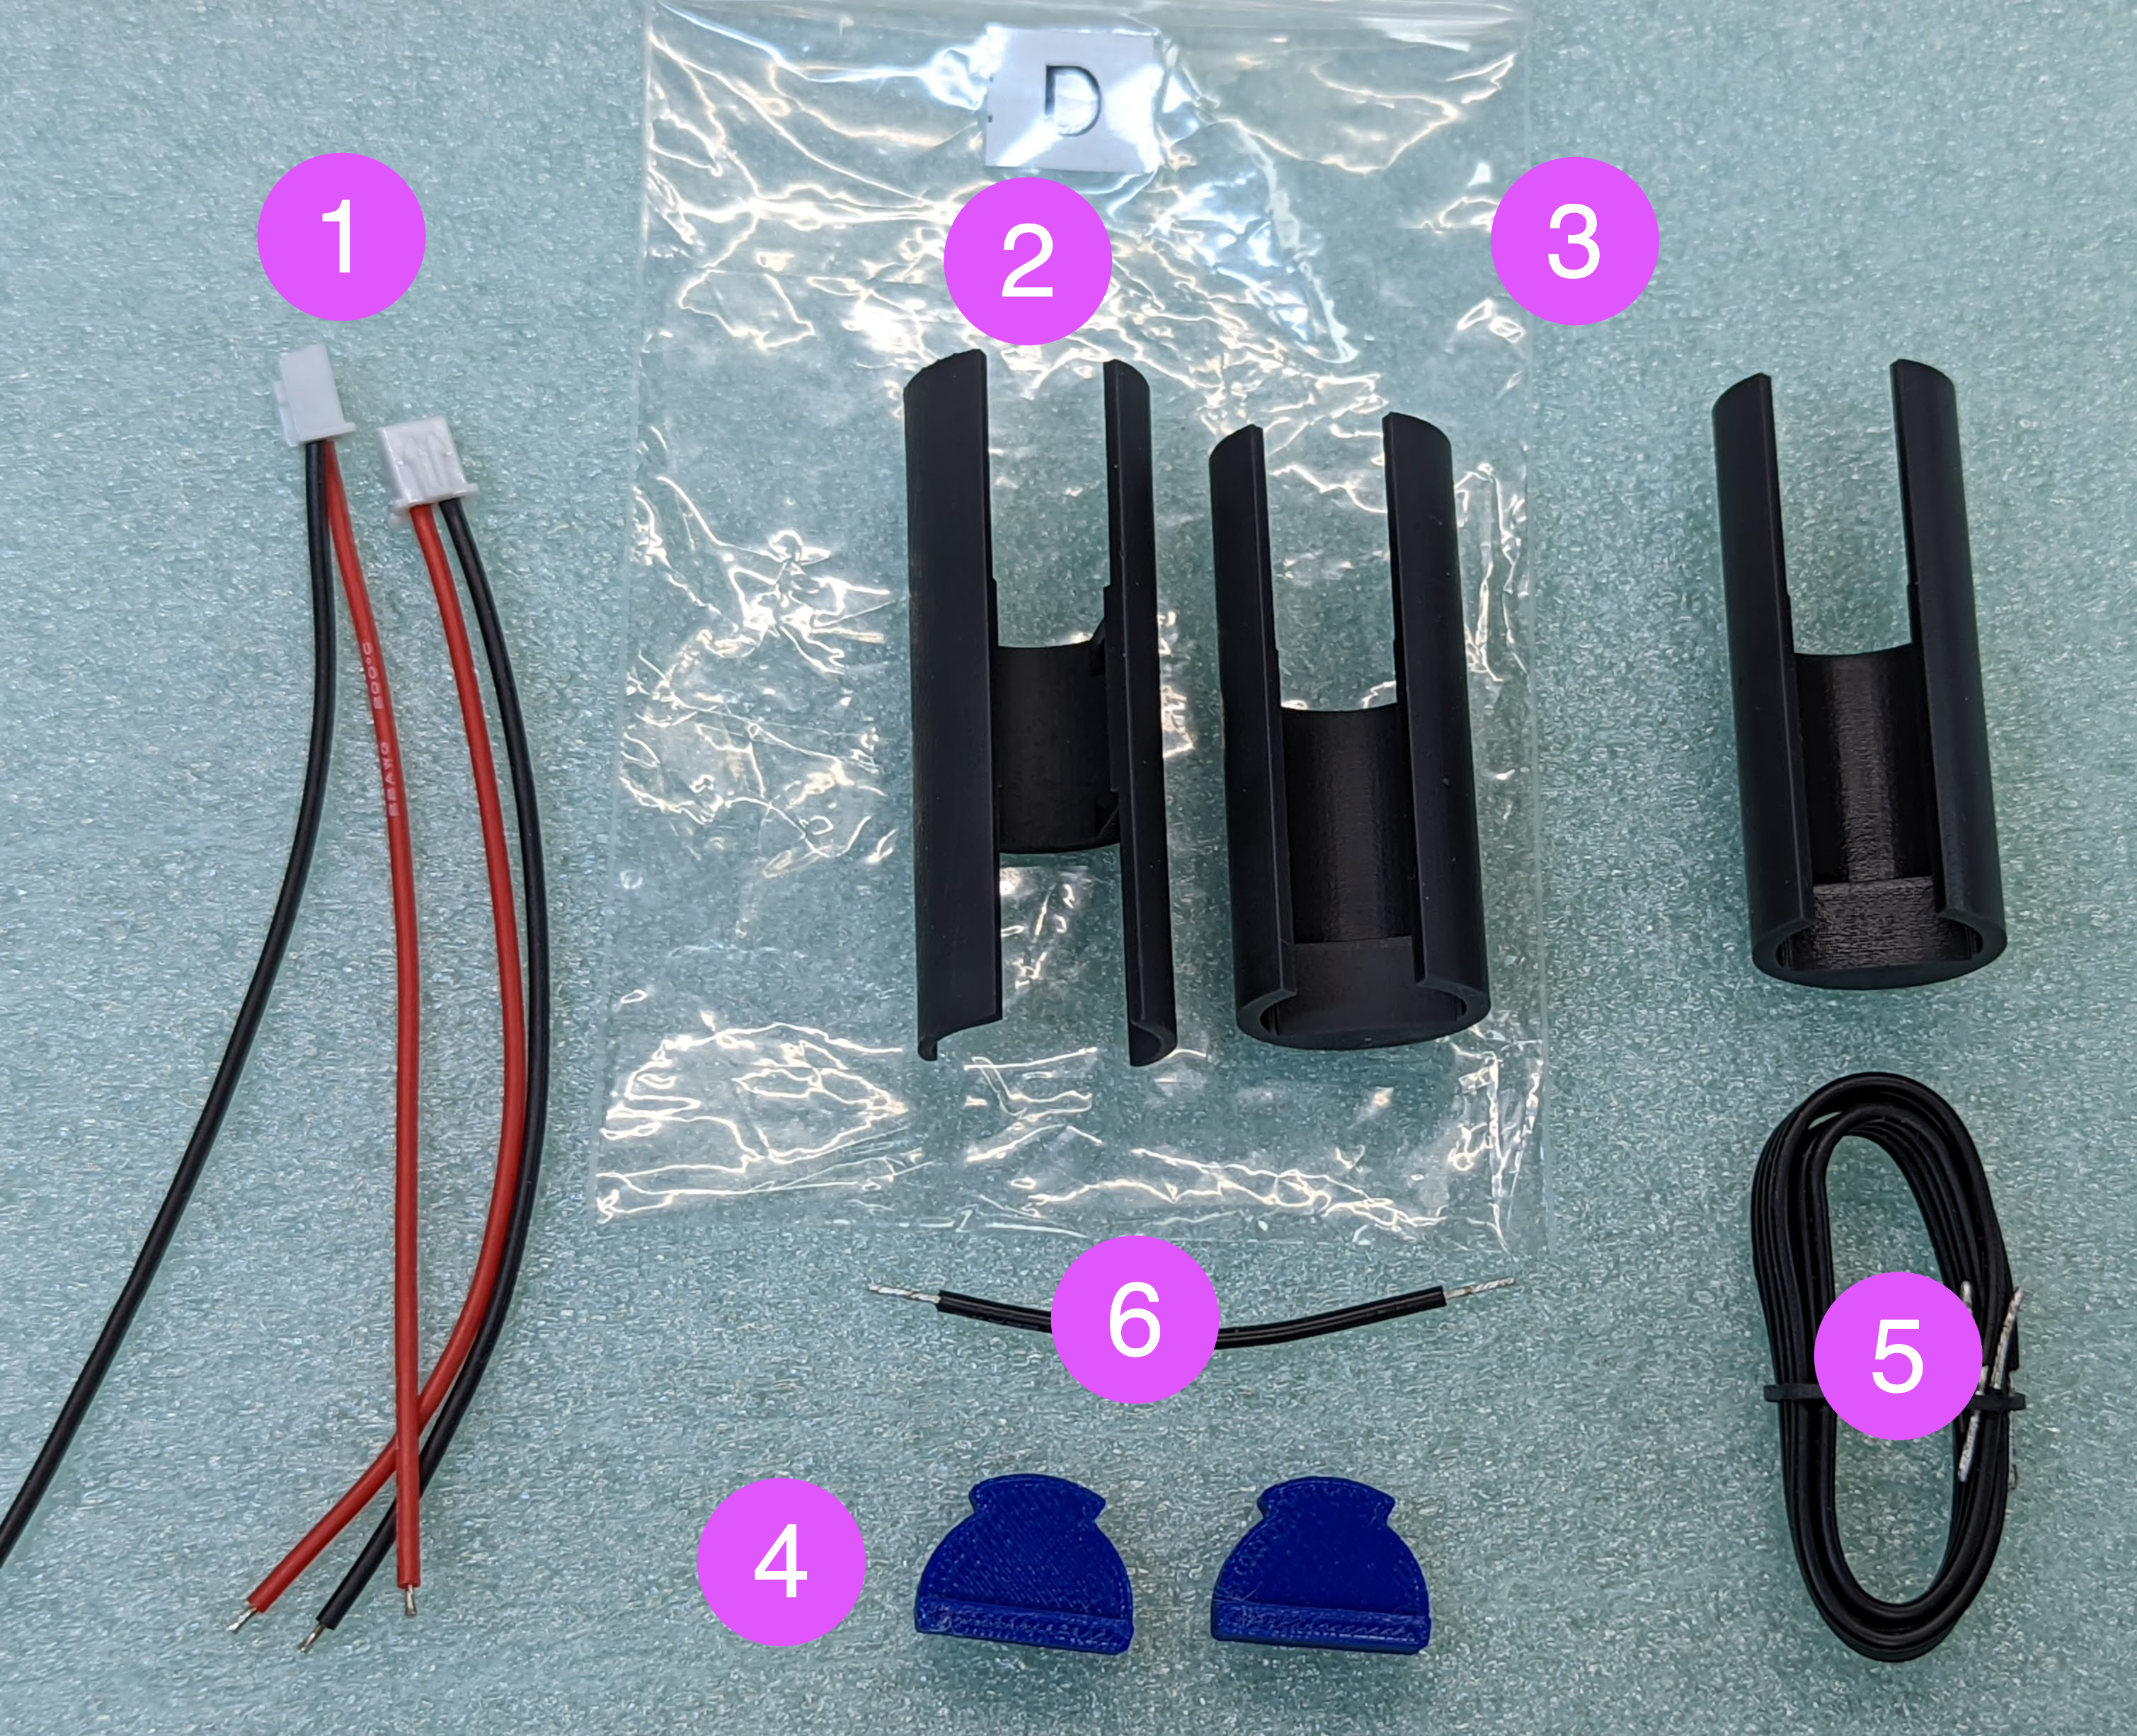
two 2-pin wires, with JST XH connector
3d printed spacer, to go between batteries
Two 3d printed spacers to go at the ends of batteries
3d printed “plugs”
4-pin wire (22cm, 22AWG)
Wire, 5.5 cm, 22 AWG
Two 18650 Li-Ion batteries
Steps:
Find the two 2-pin wires with XH connectors. In each of them, cut the red wire to the length of 3.5 cm (not including the connector). Strip about 5mm of the red wire and tin.
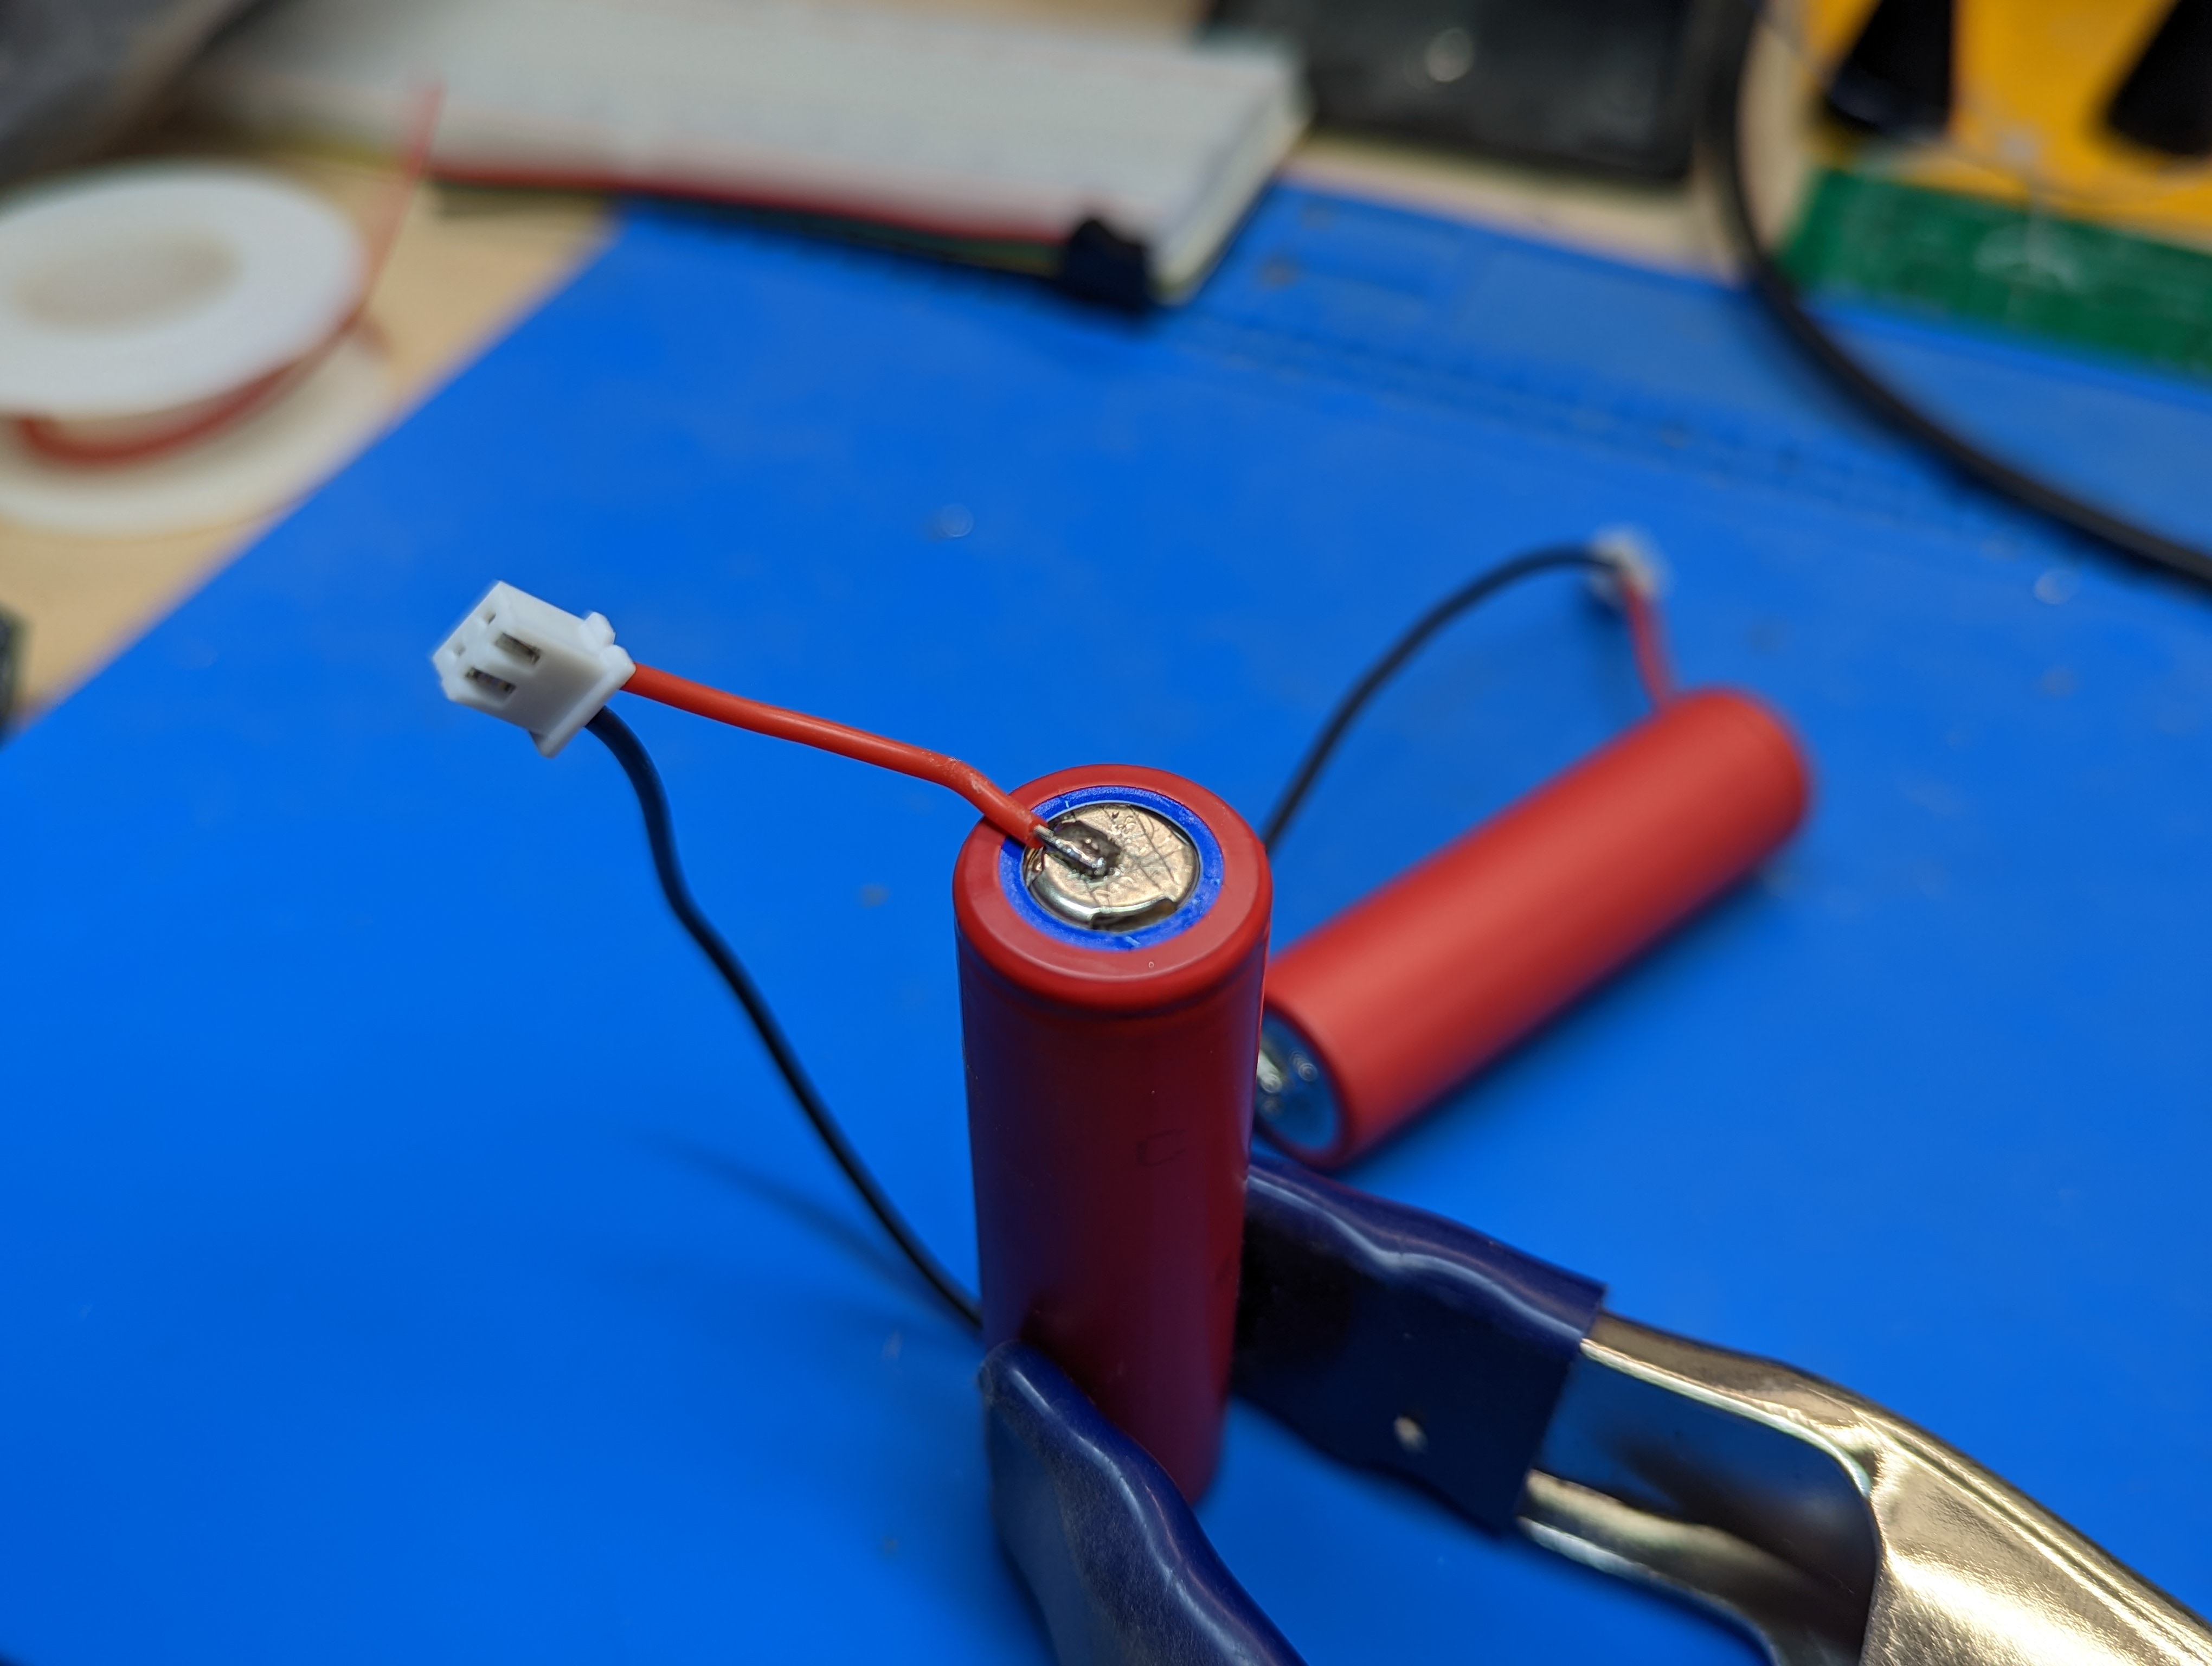
Solder the red lead of the 2-pin wire connector to positive (+) terminal of each battery. Follow instructions on this page for soldering. Tip: an easy way to keep the battery vertical while soldering is by using the clamp as shown in the photo below.
Turn each of the batteries over, with the negative terminal up. Solder the black lead to negative terminal.
Take the short black wire and solder it to negative terminals of both batteries as shown below. Take care not to desolder the previously soldered wires.
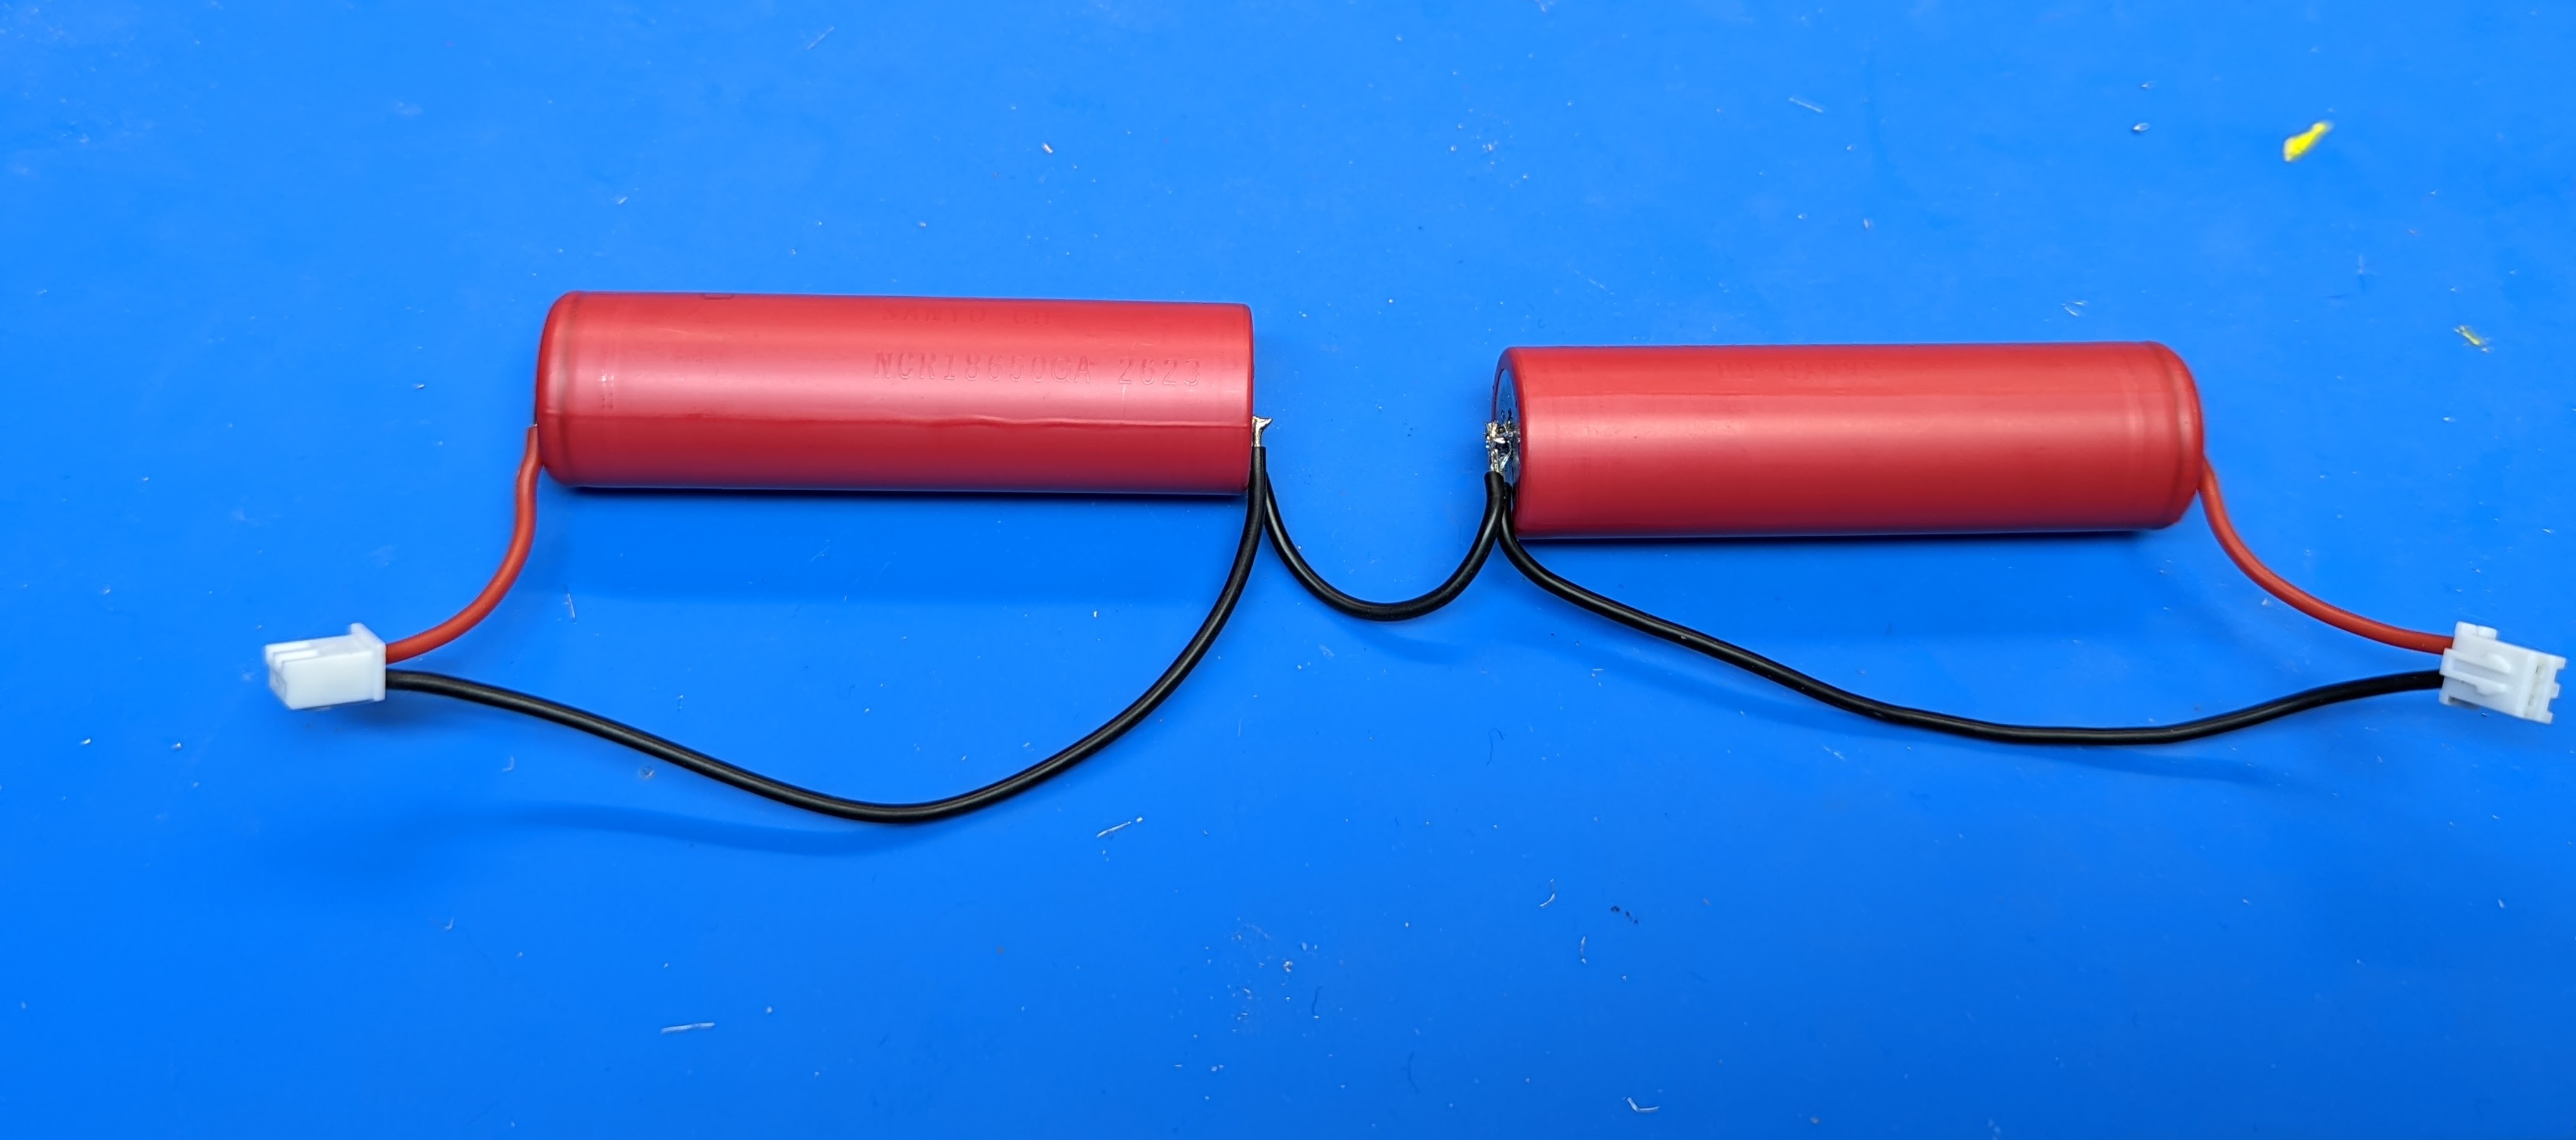
Use voltmeter to check the voltage difference between the positive terminals of the two batteries. If it is more than 0.1V, find a low ommage resistor (1 Ohm or about); insert it into positive terminals of the two battery connectors and leave for an hour to equalize the voltage.
Bag D also contains 3d printed spacers and 4-pin wire; they will be used in the following steps.